Store encrypted AppSettings and ConnectionStrings in a database

Do you have connectionStrings and appSettings with potentially sensitive data spread all over your network in various web.configs?

Do you worry about your database userids and passwords saved in source control?

I set out to solve this problem and created DBConfigurationManager. It is available as a NUGET package : https://www.nuget.org/packages/DBConfigurationManager/

DBConfigurationManager allows you to store your appSettings and ConnectionStrings in a database table. There is nothing you need to do in the code. You continue using

ConfigurationManager.AppSettings[“”] and ConfigurationManager.ConnectionStrings[“”]

When you install the package, it gives you the TABLE script you need to hold the configuration information.

pic1

as well as adds a connectionString to your web.config to point to the configuration datastore.

pic2.PNG

It is a great way to centralize your appSettings and ConnectionStrings. If you are worried about security, you could easily use SSPI and connect to the configuration database using the AppPoolIdentity or Service Account you are running your website under.

New in Version 2.0.0.0

  • Ability to encrypt your settings in the database.
  • You can either use MachineKey to encrypt or, a secret key using MD5 encryption.
  • Also, included is a tool (look in your bin folder) called StringEncryptor to create your encrypted settings.

TOOL to encrypt your Settings

pic3

Indexed Mind – Search your Company’s Brainpower!

How do you track down experts in your Organization? Indexedmind helps you find who knows what in your organization at the click of a button. No more relying on stale documentation and wikis. We engage everybody in your organization to collectively build your Company’s knowledge-base.

Think of it as LinkedIn + Quora for your Company!

We are in Private Beta! Check us out and request a FREE Beta Invite https://indexedmind.com

im_search_capture

How to bust/clear DonutCache in asp.net MVC

Let us say you have an asp.net MVC controller/action which is donutcached like below. And you want to bust the cache for some reason. An example would be. You cache a partial view for 24 hours, but give the user a refresh button to allow him to manually refresh it if he wishes to.

NOTE: you cannot use web.config based cacheprofiles for MVC. It just doesn’t work, so DonutCache is being used for that.

[DonutOutputCache(CacheProfile = "CachedAction")]
public ActionResult CachedAction(string id)
{
return View();
}

Here is the web.config

	<caching>
	  <outputCache enableOutputCache="true" />
	  <outputCacheSettings>
		<outputCacheProfiles>
			<add name="CachedAction" duration="14100" varyByParam="*" location="Any" />
		</outputCacheProfiles>
	  </outputCacheSettings>
	</caching>

Normally, in the javascript if you just call $.ajax() and request that action, it will just come back with the cached copy. The trick here is to first bust your server cache. So, you can create another action like so.

public void BustCache(string id)
{	
var Ocm = new OutputCacheManager();
RouteValueDictionary rv = new RouteValueDictionary();

if (!string.IsNullOrEmpty(id))
rv.Add("id", id);
Ocm.RemoveItems("controller", "cachedaction", rv);
}

Finally you would simply make two ajax calls. First, you bust your cache and then you call your regular MVC action to get your content.

$.get('@Url.Action("bustcache", "controller"');
$.get('@Url.Action("cachedaction", "controller")');

IIS Rewrite Rules (force www to non-www and http to https)

  • Redirect www site to non-www. eg. I use the rule below for my own website. If user browses to https://www.indexedmind.com, redirect them to https://indexedmind.com
    <system.webServer>
    <rewrite>
    <rules>
    <rule name=”Redirect WWW to non-WWW” stopProcessing=”true”>
    <match url=”(.*)” />
    <conditions>
    <add input=”{HTTP_HOST}” pattern=”^indexedmind\.com$” negate=”true” />
    </conditions>
    <action type=”Redirect” url=”https://indexedmind.com/{R:1}” />
    </rule>
    </rules>
    </rewrite>
    </system.webServer>
    
  • Redirect http request to https. eg. if user browses to http://indexedmind.com, force them to go to https://indexedmind.com
    <rule name=”Redirect to HTTPS” stopProcessing=”true”>
    <match url=”(.*)”/>
    <conditions>
    <add input=”{HTTPS}” pattern=”^OFF$”/>
    </conditions>
    <action type=”Redirect” url=”https://{HTTP_HOST}{REQUEST_URI}” redirectType=”SeeOther”/>
    </rule>
    

Testing your jquery mobile website in Chrome (Ripple mobile emulator)

If you are developing a Jquery mobile website, Chrome or Firefox serve as a great tool to debug your code and let you play withe the DOM and Javascript on the fly. However, you can never get a real feel of how the site will look/run on a mobile device.

If you are on a Mac, you can obviously use XCode’s IOS simulator which is simply awesome. On Windows you can download Visual Studio Express edition for mobile development and that ships a Windows phone emulator. 

But there is another solution which is best of both worlds. Enter Ripple (download link), a Chrome extension which nice emulates a mobile device. I am in love with it because not only does it let me see how my website will look on a mobile device but it gives me the awesome development power provided by Chrome and its debugging tools. In summary here are the benefits of Ripple

  • View your site in a variety of mobile devices Android, IOS, Windows Phone, Palm etc
  • Use Chrome’s uber powerful tools to do your development
  • Fake GPS/location services. Ripple even lets you simulate as if you are driving around!
  • Test your site on landscape/portrait orientation
  • Simulate accelerometer events.

My personal thanks to the developers of Ripple !

Image


OSX Lion and Windows 7 on the same box (Vmware, Parallels and Bootcamp compared)

I only have Macs in my house. I just kept throwing the Windows machines as they started to die off without replacing them (Yes, all the HPs and Dells are in the trash now). Although, I do lot of IOS and Ruby on Rails programming which is perfect with OSX Lion, but I only do that as a hobby. At the end of the day I have to remember that my 16 years of expertise as a Microsoft developer is what pays the bills :). 

I have tried all 3 options of running Windows on OSX. i.e Parallels Desktop, VMWare and Bootcamp.

Parallels and VMWare seem like the ideal solution at first because you don’t have to reboot your laptop into windows. You click the VMWare or Parallels icon and it fires up the Windows machine in a virtual environment. Sounds great right ? In my experience, it sounds great only in theory. Both solution do work without any problems, but performance is a different ballgame altogether. Running Visual Studio 2010 on the VMs is a pure torture. It is so slow that it is almost unusable. (I have a Macbook Pro, OSX Lion, Core i7 2Ghz with 4 GM ram and I allocated 1.5 – 2GB ram to the VM)

So, I ended up just firing bootcamp and tried to install Windows on the second partition. It did have its challenges but nothing that I couldn’t overcome. Here is what I ran into:

  1. Low disk space – OSX reported I have 350GB free, but Bootcamp kept complaining that I don’t have sufficient space. Weird right? Well, no matter how much Apple makes you believe that OSX doesn’t get fragmented, it actual does. The easiest way to defragment is to backup your machine using Time Machine, format your machine completely (i.e boot with OSX Lion DVD and use disk utility to format your partitions) and restore from Time Machine backup. This is the easiest and free way to defragment your HDD. Once you do this, Bootcamp will be a happy camper and will let you proceed.
  2. Made a mistake of allocating less space to Win 7 – I allocated 50 GB to windows 7 and thought I can install Visual Studio 2010 on it without any issues and it did work great! But then the greedy developer I am, I wanted to install Visual Studio 2012 RC on it too. And that is where I ran out of space. The solution – Reboot into OSX and use disk utility to reduce OSX partition size. Then reboot back into Windows 7 and download this free tool called Minitool Partition Wizard. Fire up the tool, click the Bootcamp partition and then choose extend merge. This will let you extend the partition and use the space you freed up using Disk Utility. (Disk Management built into Win7 will not work)

After all was done, I am loving Bootcamp/Windows 7. It is blazing fast for obvious reasons. Obviously, a virtual VM solution just cannot compare to an OS running on real hardware. I know you are still thinking “But I would hate to reboot my computer every time into Windows!!!!!”. Well, if you fire up the VMware or Parallels VM from a suspended state, you will end up wasting the same amount of time that you would physically booting into Windows 7 too. And when you want to get back to OSX, Lion will be waiting for you with its “remember open programs” feature that I have come to love. 

Backing up and fail-safing your ADAM / LDS instance

This could potentially be very long post, but I am going to stick to the high-level objectives only. Leave a comment if you want more details and I will reply to you.

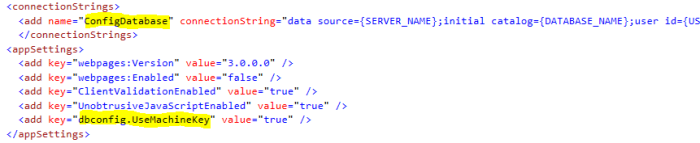
OBJECTIVE: Your users are stored in an ADAM database and your ASP.net website sits on top of this utilizing the ASP.Net membership framework to interface with ADAM to authenticate users. You want to make sure that you are covered in case of any disaster scenarios (like disk corruption, ADAM server blowing up, and manually unintended corruption by your system admins)

PROBLEM: If you notice carefully, we are talking two different things here.

  • Hardware failures – i.e Poof!!!! and your ADAM instance just disappears. Panic your website is down!!!
  • Manual data corruption – So, if your sysadmin does something foolish and say he updates all users with the same last name using a vbs script or something. This is more insidious because your website is not down, ADAM is not down but your user data is corrupt.

SOLUTION: So although we have two distinct ways of getting into trouble, the end result is the same and the solutions are also the same. But first let us talk about what is required at the minimum to recover from a failure scenario.

ADAM Replication – Fortunately, for us, ADAM (or LDS) comes out of the box with support for replication. What this means, is once your main ADAM instance is up and running you can install multiple ADAM instances on other servers as “replicated instances” and all these servers magically know how to talk to each other and keep their data in sync with each other.

Plus, it gives you the flexibility of turning on “two way” replication. i.e you change data on the replicated instance and the main ADAM server reflects these changes. You have the option of staggered replication. i.e the replicated instances will receive deltas from the main server only after XX minutes or hours. Any light bulbs yet on how you will use this to recover from bad things happening?

Windows Backups – I know, I know. Nobody uses Windows Backup and Restore. But this is the perfect place to use it. You simply setup a backup job which backs up your ADAM directory to a file server. We have done it where I work and this gives us nightly backups for every day going back to last 60 days. Also, ADAM has a lock on the files on disk, but Windows Backup used Volume Shadow Copy which takes care backing up files even if they are locked by a process. We use the append option, so backups are not overwritten every night, but are appended (Keep an eye on that backup file though…it can grow pretty fast !!!)

So, now that we know the proper way to protect us from bad things. Here is how you will apply it to various situations:

  1. Hardware failures – If your main ADAM server blows up, you could simply point your website to the replicated instance since it has the latest and greatest data.
  2. Data Corruption by SysAdmin – So, if your sysadmin writes a script which updates every one’s SSN to 000-00-0000 for example, you could either restore the ADAM data from last night’s backup (believe me it is amazing simple to overwrite ADAM data from backup and get up and running in no time). Or, if you had staggered replication setup (i.e replicated instances receive change deltas only after 1 hour and your sysadmin reports the data corruption to you in time, you can shutdown the main ADAM instance and point your website to the replicated instances because they still have good data.

Bottom-line, you can use replicated instances for instantly recovering from the failure scenario, while you are busy building the main instance from the backups. If you have two way replication setup then when you bring the main instance online, the replicated instances will send their deltas back to the main instance (so for example 100 users signed up before you could restore the main instance from backups), these 100 users are only in the replicated instance now. But the moment you bring back the main ADAM instance up, replication will send these users back to the main instance and you will be in sync.

SOLVED: iexplore.exe – The directory name is invalid

I love the “run as” option in Windows and I use it all the time to test my websites especially if they need Windows Auth (NTLM) or with desktop software which uses your windows creds.

Recently, I started facing this error whenever I try the “run as” option and it got me frustrated enough to find a solution for it. Here is the dreaded message that you get when doing “run as”

Image

Finally found the solution :

To resolve this problem follow these steps:

  1. Click Start, point to All Programs, and then point to Accessories.
  2. Right-click Command Prompt or Notepad, and then click Properties. (I know you are trying to solve IE issues but you have to change properties of notepad or command prompt..weird right?)
  3. In the Start in box, change the value from %HOMEDRIVE%%HOMEPATH% to a system-wide value such as %WINDIR%.
  4. Click OK.

That is it! you are done. Leave a comment if it doesn’t work for you,

Control ctl00_ContentMain_ xxxxx of type ‘GridView’ must be placed inside a form tag with runat=server

Recently I wrote some simple code to Export the contents of a GridView to Excel. You know, the basic stuff like changing the type to application/ms-excel content and removing Images from the GridView (so that they don’t appear as missing images in the Excel sheet) and converting Hyperlinks to Labels.

The Problem : But when I ran my code, I got the dreaded error :Control ctl00_ContentMain_ xxxxx of type ‘GridView’ must be placed inside a form tag with runat=server

The Solution :  Just place this code in your codebehind. And that will fix ya! :

public override void VerifyRenderingInServerForm(Control control) {}

The Explanation :
Asp.net calls VerifyRenderingInServerForm to ensure that every single server control is being rendered inside a <form runat=”server”> tag. Which makes sense for a web page.  But it doesn’t make sense for an Excel sheet. Since, we just want to send the Gridview contents to the client and not the Form tag.

All we are doing here is overriding this Method and falsely reporting to Asp.Net that our Control is actually being rendered inside a <Form Runat=’server’> tag.

Hope it helps…

Installing Windows 7 (using Bootcamp) on a Mac with Parallels installed on it

I finally managed to install Windows 7 beta on my Macbook. I must say I am liking it so far. Of course it is a beta, so you have to keep that in mind. Plus, I am still hunting for drivers for my sound card(found it..see below for link) and isight camera. The setup for Windows 7 was smooth as a cake. Thats what I call unattended setup. No questions asked! the computer reboots a couple of times you enter the product key, and you are golden 🙂

The reason why I am writing this blog entry is that I wasted a lot of time getting Boot Camp to partition my Macbook hard drive so that I can install Windows on it. And I finally found a solution for it.

The problem : My Macbook with Leopard on it has a 200GB hard drive and only 5 GB was free. Also, I have a Vista installation on my Macbook which I run using Parallels desktop software. It is much better than Virtual PC.

So, obviously with 5 GB space I couldnt do anything. First I had to use a software called Diskkeeper to tell me which files were eating up all the space. I found a lot of redundant stuff, which I deleted and finally was able to create 50gigs offree space. I was happy with my cleanup. 

I fired up Bootcamp and gave 32GB to the Windows parition that I was about to create. But, after running for 5 minutes, Boot camp comes back with an error saying that some files could not be moved and the paritioning failed ! 😦

The Solution: After doing lot of research,  I finally found that the culprit was the Parallels desktop .hdd files.

So, I moved the entire Documents–>Parallels folder to my 32GB usb drive (formatted with Mac OSX partition). To move it you simply drag and drop it while keeping the Command key pressed. This created 30GB more free space on my Mac. And Boot camp had no problem creating the parition after this.

e free space on my Mac. And Boot camp had no problem creating the parition after this.

The bottomline is that Bootcamp doesn’t fail because you have less disk space, it fails because the .hdd files used by Parallels desktop are either marked readonly or are too big for it to move around to create a new partition.

Drivers : I found the driver for the sound card. Here is the direct link to the manufacturer’s site : http://www.realtek.com.tw/downloads/downloadsView.aspx?Langid=1&PNid=14&PFid=24&Level=4&Conn=3&DownTypeID=3&GetDown=false